


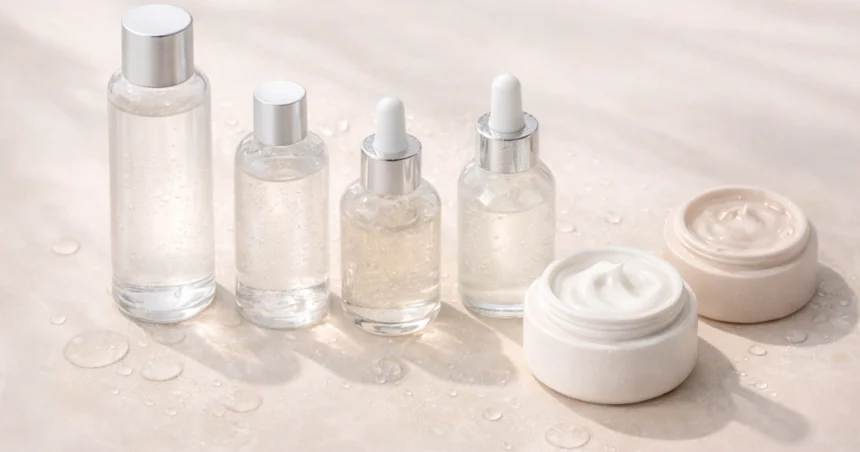
The first time I saw a full Korean skincare routine, I was overwhelmed.
Toner, essence, serum, ampoule, emulsion, cream, how could anyone need that many products? It seemed excessive, maybe even a marketing ploy to sell more stuff. My American skincare upbringing had taught me simple was better. Cleanser, moisturizer, done.
But my skin was perpetually dehydrated. That tight feeling after cleansing. Fine lines that appeared when I was tired or stressed. Makeup that clung to dry patches no matter how much moisturizer I slathered on. I was doing what I’d always been told to do, and it wasn’t working.
So I tried the layers.
Not the full 10-step routine right away, that felt too intimidating. Just a hydrating toner before my moisturizer. Then an essence. Then a serum. Slowly building up, paying attention to how my skin responded.
The difference was remarkable. My skin didn’t just feel more hydrated, it looked different. Plumper. Dewier. That coveted bouncy quality I’d seen in K-beauty ads but assumed was genetics or good lighting. Turns out, it was layers. Thin, watery layers of hydration, stacked strategically and sealed in properly.
Now layering is second nature. And I’m convinced it’s the single most important technique I’ve learned from Korean skincare.
Why layering matters
The philosophy behind Korean skincare layering is fundamentally different from the Western approach.
Western skincare traditionally focuses on one or two products doing heavy lifting. A thick, rich moisturizer applied once is supposed to handle all your hydration needs. The assumption is that more product equals more moisture.
Korean skincare flips this. Instead of one heavy layer, you apply multiple thin layers that build on each other. Each layer adds hydration while helping the next layer absorb better. The result is deep, lasting moisture that a single product can’t achieve alone.
Think of it like watering a plant. If you dump a huge amount of water all at once, most of it runs off or sits on top of the soil. The roots don’t absorb it efficiently. But if you water slowly, in smaller amounts over time, the soil has a chance to absorb each addition. The water goes deeper and actually reaches where it’s needed.
Your skin works similarly. A thick cream sitting on top of dry skin can only penetrate so much. But thin, watery products absorb quickly and prep your skin to receive the next layer. By the time you apply your cream, your skin has already received multiple doses of hydration, and it’s primed to absorb even more.
This is why someone using five lightweight products might have better-hydrated skin than someone using one expensive heavy cream. It’s not about the products. It’s about the technique.
The thinnest-to-thickest rule explained
The core principle of Korean skincare layering is simple: apply products from thinnest to thickest consistency.
Watery products go first. Creamy products go last. Everything else falls somewhere in between based on texture.
The science behind this makes sense. Thin, water-based products have smaller molecules that can penetrate your skin more easily. If you apply a heavy cream first, it creates a barrier that prevents lighter products from getting through. You’re essentially blocking your expensive serum from doing its job.
By going thinnest to thickest, each layer can penetrate before the next layer goes on top. Your watery toner absorbs, then your essence absorbs, then your serum absorbs, and finally, your cream seals everything in place.
A typical layering order looks like this:
- Toner (most watery)
- Essence (slightly thicker than toner, still very fluid)
- Serum or ampoule (more concentrated, gel-like or slightly viscous)
- Emulsion (lightweight lotion, optional step)
- Moisturizer/cream (thickest consistency)
- Facial oil (if using, oils are occlusive and go last)
- Sleeping pack (nighttime only, very last step)
You don’t need all these steps. Most days, I use four or five products total. The point isn’t to maximize the number of layers, it’s to apply whatever products you do use in the right order.
My actual layering order (morning routine)
Mornings are rushed in my house. Two kids to get ready, Mochi demanding her walk, coffee to consume before I’m functional. My morning skincare needs to be efficient.
Step 1: Gentle cleanser or water rinse. I don’t always use cleanser in the morning since my skin isn’t dirty from sleeping. Sometimes just a splash of lukewarm water is enough.
Step 2: Hydrating toner on damp skin. This is key, I apply toner while my face is still slightly wet from rinsing. The dampness helps the toner spread and gives humectant ingredients like hyaluronic acid moisture to work with. I pat it in with my palms, no cotton pad.
Step 3: Essence or lightweight serum. My morning essence is always hydrating, nothing too active. I want to plump and prep my skin, not treat it aggressively before facing the day. A few drops, patted gently.
Step 4: Moisturizer. In the morning, I use something lightweight, a gel cream or light lotion that absorbs quickly. Heavy creams can interfere with sunscreen and makeup.
Step 5: Sunscreen. Non-negotiable. Every single day. I wait about a minute after moisturizer to let it absorb, then apply SPF generously.
That’s five steps, maybe three minutes total once you’re used to it. No elaborate rituals, just efficient layering.
My actual layering order (evening routine)
Evenings are when I invest more time and use more layers. The kids are (finally) asleep, Mochi is snoring on her bed, and I have a few minutes to actually enjoy my routine.
Step 1: Oil cleanser or cleansing balm. The first step of double cleansing to remove sunscreen and any makeup. I massage it onto dry skin, then rinse.
Step 2: Water-based cleanser. A gentle, pH-balanced cleanser to remove any residue. My skin should feel clean but not tight.
Step 3: Toner on damp skin. Same as morning, applied while my face is still wet from cleansing. Sometimes I do two or three layers of toner if my skin is feeling particularly parched (the “7-skin method” in miniature).
Step 4: Essence. A hydrating essence to start building moisture. Patted in gently.
Step 5: Treatment serum or ampoule. This is where I use any actives I’m incorporating, vitamin C, niacinamide, whatever I’m focusing on. If my skin is feeling sensitive, I skip actives and just use another hydrating serum.
Step 6: Eye cream. Gently patted around the orbital bone. Not too close to my actual eyes.
Step 7: Moisturizer. At night, I use something richer than my morning cream. My skin has hours to absorb it without worrying about makeup or shine.
Step 8: Facial oil (optional). If I’m using squalane or another face oil, it goes here, after moisturizer or mixed into it.
Step 9: Sleeping pack (a few times per week). Not every night, but when I want extra hydration. This is the final seal that locks everything in.
Eight or nine steps sounds like a lot, but most of them take seconds. The whole routine is maybe ten minutes, and honestly, those ten minutes of patting products into my skin while the house is quiet have become something I look forward to.
Patting technique: how and why
You’ll notice I keep saying “pat” instead of “rub.” This is intentional.
Korean skincare emphasizes patting or pressing products into your skin rather than rubbing them across your face. There are a few reasons for this:
Less tugging on skin. Rubbing pulls at your skin, especially the delicate areas around your eyes. Over time, this can contribute to loss of elasticity. Patting is gentler.
Better absorption. The pressing motion seems to help products absorb more effectively. I don’t have scientific proof of this, but my experience suggests patted-in products feel like they penetrate better than rubbed-in ones.
More product stays on your face. When you rub, some product ends up on your palms or gets pushed around instead of absorbing. Patting deposits product and leaves it there.
It’s more relaxing. There’s something meditative about gently patting your face. It feels like care rather than a chore.
To pat correctly: dispense product onto your fingertips or palms, then use gentle pressing motions to apply it all over your face. Work from the center outward. Use your ring fingers around your eyes since they apply the least pressure. Don’t slap your face hard, gentle, repeated pressing is the goal.
Do you need to wait between layers?
This question comes up constantly. Do you need to wait for each layer to absorb before applying the next one?
The honest answer: it depends, but usually not long.
For most hydrating layers (toner, essence, serum), you just need to wait until the product feels mostly absorbed, maybe 20-30 seconds. Your skin shouldn’t be dripping wet when you apply the next layer, but it doesn’t need to be completely dry either. A slight tackiness is fine and actually helps the next layer adhere.
For certain active ingredients, waiting matters more. If you’re using vitamin C at a low pH, waiting a few minutes before your next step can improve its effectiveness. Same with certain acids. But for purely hydrating products, no extended waiting needed.
My rule of thumb: if the product I just applied has absorbed enough that my skin feels tacky rather than wet, I move on. This keeps my routine efficient without rushing so much that products pile up on top of each other.
Signs you’re layering too much
More layers isn’t always better. Sometimes I get overenthusiastic and my skin lets me know.
Pilling. If products ball up and roll off your skin when you try to apply the next layer, you’ve used too much of something or you’re not letting layers absorb enough. Dial back the amount or wait a bit longer between steps.
Greasy or heavy feeling. Properly layered products should absorb and leave skin feeling hydrated but not greasy. If you feel like you’re wearing a mask of product, simplify.
Breakouts in unusual places. Sometimes over-layering can lead to congestion, especially if you’re using too many heavy products. If you notice new breakouts after adding layers, scale back.
Products not performing. If your expensive serum doesn’t seem to be doing anything, it might be getting blocked by layers applied before or after. Reassess your order.
The goal is hydrated, healthy skin, not the maximum possible number of products. Listen to your face. Some days it wants all the layers. Some days it needs less.
Making layering work for you
Korean skincare layering changed my skin more than any single product ever has. The technique matters as much as what you’re using.
Start simple if this is new to you. Add one layer, a hydrating toner before your moisturizer, and see how your skin responds. Build from there if you want more. There’s no rule that says you need seven steps or ten steps or any specific number. You need as many layers as your skin benefits from.
The thinnest-to-thickest principle, the patting technique, the damp skin application, these small adjustments compound into real results. Your products work better. Your skin holds onto moisture longer. That bouncy, hydrated look stops being aspirational and starts being attainable.
It’s not about doing more. It’s about doing it right.

Estoy preparando una salida en moto de agua durante una escapada en Tenerife. Quiero una ruta guiada, no una prueba de velocidad. Las paginas anuncian una experiencia sencilla, pero no aclaran los detalles que cambian el dia. Mi prioridad es una explicacion clara, una costa agradable y tiempo suficiente para decidir sin presion. He comparado salidas desde Los Gigantes. Para ordenar mis preguntas revise [url=https://motoacuaticatenerife.top]una pagina para comparar salidas acuaticas[/url]. Anote el horario, el punto de encuentro, la duracion en el agua y la cobertura. La organizacion previa debe ser buena. El precio final tiene que ser claro. El monitor deberia ser atento. La ruta debe sentirse serena. El mar conviene que este aceptable. El chaleco debe quedar ajustado. El grupo deberia ser cercano. La reserva tendria que estar confirmada. El regreso debe ser puntual. La espera inicial deberia ser comoda. La salida necesita un ritmo prudente. El trato deberia parecer profesional. ?Que detalle practico les ayudo mas al reservar? Quedo atento a recomendaciones.
I am preparing a small set of Suno stems for a community project, and the last export left faint clicks and metallic tails between phrases. The tracks are usable, yet those details become distracting on headphones. I do not need a dramatic remake; I want careful cleanup that preserves timing and the character of the vocals. While comparing practical options, I found [url=https://sunoaudiofix.top]this workflow note[/url]. It gave me a starting point, but I would value advice from people who have tested similar tools. I am trying to decide whether selective repair belongs before or after a light EQ pass. My practical concern is retaining natural vocal detail. A quiet test render seems appropriate. I can compare separate sections without changing the whole track. The repair should remain measured. Any processed layer must align precisely with the original. I also need repeatable settings for later revisions. A modest listening session may reveal more than meters alone. The final mix should still feel warm. The chosen steps must be safe to document. I will also listen at comfortable volume. I would rather leave a minor flaw than create a new one. Has anyone found a dependable order for this kind of limited repair? Examples from recent mixes would help.
Hola a todos, estoy planeando un viaje a Tenerife y me encantaria hacer jetski durante mi estancia. Anduve buscando datos sobre los dos lugares mas recomendados para esta actividad: Los Gigantes y Playa de las Americas. Por lo que he visto, Los Gigantes tiene unos acantilados impresionantes que creo que proporcionarian un fondo impresionante mientras estas sobre el agua, pero he leido que puede ser un poco mas dificil para alguien con nivel intermedio, especialmente con el oleaje y las corrientes que representan un reto considerable. Por otro lado, Playa de las Americas parece bastante mas sencilla para empezar, ideal para pasarlo bien sin complicaciones, aunque las vistas no son tan impresionantes. Para alguien que quiere disfrutar de buenas vistas sin perder la calma, ?cual recomendarian? He encontrado un post con fotos y analisis que facilitan comparar ambas opciones [url=https://alquilermotoacuaticatenerife.top]jet ski puerto colon[/url] , pero me gustaria conocer opiniones de primera mano de quienes hayan probado jetski en ambos sitios. ?Cual creen que tiene mejor entorno para alguien como yo que busca algo accesible pero con buen paisaje? Les agradezco de antemano sus opiniones.
I am revisiting my seasonal analysis because olive skin seems to confuse many quizzes. My hair is distinctly dark and my eyes are medium brown, so the overall contrast can look winter-like. However my skin has a green-gold cast that automated tools often interpret as warm. Warm orange is usually unflattering while cool berry and deep teal are usually easier to wear. That reaction makes me question whether I belong in a cool winter range or a softer neighboring season. [url=https://seasonal-palette.top]olive skin tone seasonal palette[/url] gives me a structured reference but I do not want to force the result to match one chart. For a careful self-check would you compare pure white with cream before testing accent colors? The usual jewelry test gives mixed results so I need clues that work better for olive skin. I can repeat each fabric comparison and review whether shadows, redness, or eye definition change. Which shades provide the clearest distinction without relying on stereotypes about skin depth? Examples from other olive users would be especially useful. I care more about repeatable tests than matching every traditional description perfectly. I would value your experience
I have been attempting a simple undertone check with my phone, but the result changes every time I move rooms. Warm ceiling lights seem to change the apparent balance of my skin much more than I expected. For a cleaner comparison, I want to take several photos near the same window on separate days. It seems sensible to keep makeup, filters, and automatic colour effects out of the process. Rather than treating one picture as proof I would compare a few neutral fabrics beside my face. Soft white, muted blue, berry, and charcoal would give me more than one clue to consider. I would like to track whether each shade makes shadows, redness, or unevenness more noticeable. A later side-by-side review seems more useful than an instant reaction. For a structured first pass, I am looking at [url=https://faceshapeanalysis.top]skin undertone test camera[/url] What would you standardise first before comparing the photos?
I have been trying to understand my color season, but the labels keep varying between two neighboring palettes. One assessment says Soft Summer while another leans toward Soft Autumn. My skin reads as broadly neutral and both muted ranges seem plausible in indoor light. I compared several photos but camera settings may be influencing what I see. Before changing my wardrobe I would like a more repeatable way to compare the options. [url=https://seasonal-palette.top]seasonal palette test[/url] looks like a useful checklist rather than a final verdict. Would you treat undertone as the first clue or compare chroma and contrast before temperature? I can test several colored scarves so I am happy to do a careful home check. A bright window gives neutral light and I can keep the camera exposure fixed. Which clues would show you that one muted season is more accurate than the other? I am most interested in hands-on advice from people who have worked through a similar overlap. One remaining concern is avoiding changes caused only by camera white balance. It would also help to learn how many comparisons are usually enough before a pattern becomes clear. I appreciate any suggestions
I’m thinking about changing my hair color, but I want to understand my undertone first. My phone photos look quite different depending on the room. In daylight my skin looks fairly neutral, while the bathroom light makes it look much warmer. I realize the phone may change the white balance. I don’t want to pick a hair shade based on one misleading picture. Is open shade outside a better place to take the photo? I’m also unsure whether to compare my face with a white shirt, a gray background, or several fabric colors. The usual vein test has not helped me much. I found this page while looking into [url=https://hair-color.top]skin undertone test camera[/url] and plan to use it as a starting point for comparing colors rather than treating one result as a verdict. What small changes helped you get a steadier comparison? I can keep my clothing the same across photos. That should make changes in the light easier to spot. I’d especially appreciate advice from anyone who checked their palette before making a hair appointment. I have time to try a more careful comparison before I book.
En una ruta por Andalucia nos planteamos dormir cerca de Ronda en una burbuja. Nos apetece cambiar una noche de hotel convencional, pero viajariamos en verano y no sabemos cuanto se calienta antes de que caiga el sol. Para nosotros el descanso cuenta mucho. Por eso quisiera saber si la climatizacion funciona toda la noche sin hacer ruido. Otra duda es si entra demasiado sol en cuanto amanece. He encontrado informacion general sobre [url=https://dormirenunaburbuja.top]casa burbujas ronda[/url] pero antes de elegir una fecha quiero preguntar por las condiciones concretas de cada establecimiento. ?Alguien ha dormido alli en julio o agosto? No tendremos mucho equipaje. Queremos pasear por Ronda y llegar despues; importa la hora limite de entrada y si el camino esta indicado. Sabemos que las estrellas dependen del tiempo, no del alojamiento. Si queremos saber que sucede si hay tormenta o viento fuerte y si las condiciones de cambio de fecha aparecen por escrito antes del pago. Tambien preguntaria por la limpieza del material transparente y por la separacion entre habitaciones. Si habeis estado en una burbuja por esa zona, ?que detalle os hizo decidir que la reserva merecia la pena? Cualquier dato sobre temperatura, llegada o cambios de fecha sera bienvenido.
I need to gather useful color information during a remote consultation because the client cannot visit the salon until the day we perform an in-person strand test. I need notes that remain useful when we later compare real swatches. The difficulty is that her webcam adds warmth while the reference photographs she sent were taken under several kinds of indoor lighting. I do not want to diagnose an exact season remotely, but I would like the conversation to narrow down sensible shade families before the appointment. I am using this [url=https://onlinehaircolor.top]online color analysis[/url] as a question guide rather than a substitute for physical swatches. Should the client send an unfiltered window-light photograph, and is it worth comparing the same image on two devices during the call? I also plan to document old color, regrowth, and practical constraints. Which observations are safe to collect before an in-person assessment?
I tried taking a few phone photos to understand my undertone before changing my hair color. The same face looks warmer by a window in the evening and cooler under a bright bathroom light. The shifting colors make a neat online result hard to trust on its own. I am starting with light brown hair and only want a modest shift in tone. I found [url=https://choosehairstyle.top]skin tone analysis[/url] while looking for a way to compare images, but I still need a sensible way to use the information. I want a shade that works in normal daylight rather than one that looks good only on a phone screen. I can take pictures with the same plain background, no beauty filter, and my hair pulled away from my face. Would indirect daylight and a neutral shirt make comparisons more consistent? I am also thinking of holding a few fabric colors near my face rather than deciding from a single photograph. A stylist could then compare actual hair swatches against my skin and natural roots. That would give us something concrete to discuss instead of trying to prove that an app assigned the right season. I would keep the comparison photos unedited so the colors are easier to judge. If your photos gave conflicting undertone clues, how did you decide whether to try neutral or cool hair color?
I am in a small theatre production next month, and the costume designer suggested face-framing bangs for my character. That sounds lovely in a still photo, but I have to pin my hair up between scenes, sometimes in less than two minutes. There is also a lot of movement on stage. A fringe that falls into my eyes would be distracting, particularly with bright lights facing the audience. Clear vision matters when I move around other performers. My hair is fairly fine with only a slight wave, so I cannot count on a styled bend staying in place for the whole performance. I found [url=https://hairstylingtips.top]curtain bang lengths[/url] helpful for naming the options, but I need to decide where the shortest pieces should actually end. Would a longer fringe be easier to pin back quickly? I can rehearse with clips before cutting anything, although the final costume headpiece may change how the hair sits. A rehearsal should show whether the clips stay secure. The fringe should still be manageable on ordinary days. A workable backstage routine matters more to me than a perfect publicity photo. Has anyone dealt with bangs during quick costume changes? What length gave you a useful frame without blocking your view?
Подбираю небольшой подарок из Праги для родственницы, которая интересуется уходовыми средствами и обычно внимательно читает состав перед покупкой. Мне удобнее прийти с коротким списком вопросов, чем пытаться разобраться во всех надписях и обещаниях уже у туристической витрины. Пока ищу полезный материал по запросу [url=https://praguetrip.top]чешская косметика.[/url] Интересует не рейтинг самых популярных покупок, а понятный способ сравнить несколько средств по назначению, составу и выраженности запаха. Мне нужен простой подарок с понятным назначением; необычные активные компоненты и обещания решить кожные проблемы сейчас не входят в задачу. Хочу заранее учесть размер упаковки и правила перевозки, а в магазине обязательно посмотреть срок годности и целостность защитного оформления. Если выбирали подобные подарки, расскажите, какие вопросы задавали продавцу и удавалось ли получить достаточно понятные ответы по составу и аромату. Хорошо бы начать с малого формата и доступного тестера; покупать большой набор без знакомства с ароматом мне пока кажется неудобным.
Перенёс заметки на новый телефон и занялся старыми туристическими ссылками. За несколько поездок накопились страницы, скриншоты и короткие подписи, смысл которых уже не всегда понятен. Некоторые материалы сохраняли для реального выезда, другие просто казались интересными. Нужна простая подборка, в которой легко разобраться позже. Полностью очистить список не хочется, хотя пользоваться им трудно. Среди неподписанных записей нашлась ссылка с пометкой [url=https://wiengid.top]venagid[/url] — решил дописывать к похожим ссылкам цель сохранения. Не собираюсь считать старую закладку готовой инструкцией. Если снова понадобится соответствующая тема, проверим условия заново и зафиксируем дату этой проверки. Пока предлагаю три поля: тема, источник и вопрос. В отдельной строке можно отметить дату последнего чтения. То, что ещё требует проверки, отметим прямо в записи. Список общий, и им пользуются несколько человек, поэтому подпись должна быть понятной без объяснения автора. Хочется открывать заметку и сразу видеть, что осталось выяснить перед поездкой. Как вы отличаете полезный источник от случайной ссылки, когда возвращаетесь к заметкам через год? Поделитесь простой структурой записи для такого списка.
На поездку в Потсдам у меня есть один свободный день, и хочется заранее прикинуть, какую часть его займёт прогулка. Ранний подъём хотелось бы исключить, но возвращение тоже ограничено: на вечер уже есть другие планы. Мне нужен спокойный порядок действий: добраться, погулять и вернуться, оставив небольшой запас на непредвиденные задержки. В качестве отправной точки взял описание по запросу [url=https://travelgid.top]потсдам сан-суси как добраться[/url] — это отправная точка для дальнейших уточнений. С собой планирую взять воду и небольшой перекус, но остановку на обед тоже хотелось бы предусмотреть. Для меня это первая поездка в Потсдам, поэтому расстояния по карте пока трудно соотнести с реальной прогулкой. Остался вопрос к тем, кто уже был: где лучше начать прогулку, чтобы не делать лишних кругов? Сравниваю два порядка: сначала центр, затем парк либо прогулка по парку с возвращением через город. Посещение интерьеров рассматриваю отдельно, поскольку заранее купленный билет может сделать весь маршрут менее гибким. Если такой день получается слишком плотным, подскажите, какую часть маршрута разумнее сократить без ощущения бесконечной гонки.
Обсуждаем поездку с друзьями, в которой автомобиль не будет обязательной частью отдыха. Жильё пока выбираем, поэтому есть возможность заранее проверить, насколько удобно добираться до нескольких разных пляжей. Хотим избежать маршрутов, где дорога занимает большую часть дня. При этом останавливаться только у одного пляжа тоже не планируем. Пока составляем небольшой список выездов и для каждого отдельно проверяем путь туда и обратно. Самое слабое место плана — возвращение вечером. Для общей оценки расходов смотрим тему [url=https://spainbeaches.top]цены в испании[/url] и отдельно оцениваем удобство каждого маршрута. Нужно учитывать время последнего рейса и путь до остановки. Особенно если кто-то задержится за ужином или группе понадобится больше времени на сборы. Хочется также узнать, легко ли купить обратный билет заранее и где лучше проверять изменения расписания перед выездом. Какие поездки к морю подходят для подобного плана? Отдельно интересует, как вы планируете возвращение, чтобы не торопиться весь вечер.
Our music workshop will include a listening exercise using several generated exports. Students should describe what they hear before discussing the source or processing method. I would label the excerpts with neutral letters and match their playback levels. The versions would share the same passage, avoiding differences in composition. I would ask for timestamps and descriptions before accepting an explanation of the sound. The group includes people with different listening experience, so technical vocabulary should be optional. I would collect individual notes before discussing them together, and let students replay the excerpt when they need to check whether their first impression holds up. I found a resource on [url=https://sunomusicfix.top]ai audio artifact removal[/url] that might inform an optional later comparison. I do not have tested results and would introduce it only as a possible resource. An unchanged export should remain a valid preference within the exercise. Which simple criteria would encourage precise observations without steering the verdict?
For an introductory audio lesson, I want students to compare several exports of one short passage. I plan to use a short generated instrumental and keep its original export available to everyone. Students would first describe what they hear before looking at any visual representation. I found [url=https://sunofixer.top]mp3 to spectrogram[/url] as a possible reference while planning the visual part. We would then compare documented export settings using the same passage and a consistent playback level. I want to avoid teaching that every visible difference identifies a defect in the generated source. A worksheet could separate audible observations, export settings, and questions that remain unresolved. There would be no requirement to repair the clip or produce a supposedly perfect version. Students would record the software used for each export so that their comparison can be repeated later. Which comparison mistakes should I explain before students begin this exercise?
Our next collaboration starts with a generated backing idea and a remotely recorded bass part. The arrangement is clear enough, although the rough texture could distract from the actual musical instructions. My handoff will include a tempo map, the key, chord changes, and the places where bass should enter. Would keeping the original beside a revised guide help the musician interpret the brief? The wording I found was [url=https://repairsuno.top]suno fix[/url] during my search for a clearer description; I have not tried the linked resource myself. I want the musician to follow the arrangement without treating accidental noise as a performance instruction. The bassist will work in a different recording application, so I would also welcome advice on export format, a shared starting point, and whether a count-in helps prevent alignment mistakes. What would you put in a short delivery checklist for this kind of collaboration?
I am trying to make a small secondhand work wardrobe feel coherent without replacing everything. My work clothes are mostly secondhand, so finding the right size already limits which colors are available. The goal is to build several usable combinations rather than keep buying attractive pieces that never meet. The reliable pieces are a charcoal jacket and a pair of cream shirts that I wear most weeks. A lightweight knit would fill the main gap, but the local selection will only offer a few colors. Would you begin with outfit combinations, then check the face, or reverse that order when narrowing the options? I am using this as an introduction to [url=https://bodytypes.top]personal color analysis[/url] though the result needs to help with actual purchases rather than create another list of forbidden shades. How would you keep this process simple enough to use while browsing, with only a few minutes per item?
I am returning to Madeira after a few years away and have noticed that many bookmarked travel guides still describe the island as I remember it. This time I want more current local context, especially around access to walks, transport, and events in Funchal. I have been scanning [url=https://madeiratours.top]madeira island news[/url] alongside official notices and recent visitor reports. A news report can flag an issue, but it rarely tells me whether a particular plan is affected on the day I travel. A road closure might matter greatly for one route and not at all for another. I would leave room for an alternative each day rather than building a schedule around a single viewpoint or hike. Do you check local transport operators first and then use local reports to understand the wider context? I would also like to know when to recheck, so I can make sensible reservations without treating every old recommendation as current. What is your routine for checking local conditions without spending the whole holiday refreshing updates?
I am planning a short listening exercise for an audio workshop. The aim is to help participants describe what they hear before they decide which version they prefer, rather than treating every change as an improvement. I have a generated passage in mind as the source material. Keeping the excerpt constant would be the first rule. A page discussing [url=https://musicartifactfix.top]ai music artifact removal[/url] gave me a starting point for the topic, but it does not settle how to structure the exercise. The versions should be presented at comparable listening levels. Participants could write down observations before seeing labels. An unprocessed reference belongs alongside any proposed repair. The worksheet could distinguish distracting texture from lost musical detail. We could repeat the excerpts in a different order and discuss disagreements, since a single preference vote would reveal little about the reasons behind it. How would you make this demonstration useful and fair?
The modern jewelry industry is developing very dynamically.
On this information resource Jewelry-Online.shop
you can learn more about the international jewelry industry.
Jewelry is interesting not only from a design perspective.
It is important to understand the characteristics of precious metals, gemstones, production methods, and brands.
The resource provides information about jewelry markets in different countries.
The website features articles about jewelry brands, materials, design, and current trends.
The website covers some of the most recognized names in the international jewelry industry.
From prestigious jewelry houses to modern jewelry labels, the industry offers an impressive variety of styles and collections.
Choosing a reputable jewelry store is not always easy.
The website offers information that can make researching jewelry stores and brands more convenient.
We aim to be one of the best online jewelry resources.
Our website brings together information about jewelry brands, stores, gemstones, precious metals, and industry trends.
Comparing markets in different countries shows just how diverse the jewelry industry can be.
Different countries have their own jewelry culture and consumer trends.
If you are interested in jewelry, brands, or gemstones,
the website provides useful materials for learning more about the global jewelry market.
Explore international jewelry brands and trends with Jewelry-Online.shop.